
Plan a Room in 3D Before Buying Any Furniture
Published
Planning a room in 3D before buying furniture can prevent costly size mismatches by testing each piece against measured walls, openings, and walkways first. Start with an accurate room shell, add fixed features, then model furniture using its full dimensions—not an approximate icon. A digital plan helps reveal fit and circulation problems, but it cannot predict exactly how a room will feel, look in changing light, or work for every body.
Measure the room before opening a planner
Begin with the finished interior dimensions: measure from wall surface to wall surface, and note ceiling height. Sketch the room on paper first. Record every wall in sequence, including short returns, alcoves, chimney breasts, and changes in depth. If the room is not a perfect rectangle, measure across the diagonals too; a mismatch can reveal that the corners are not square. Repeat measurements rather than assuming opposite walls are identical.
Mark a consistent starting corner and measure each feature from it. For a door, record the opening width and the distance from the corner to the nearest jamb; note which way the door swings. For windows, record width, height, sill height, and distance to the nearest corner. Add radiators, vents, built-in cabinets, switches, outlets, and any projecting trim. The IKEA guide titled Interior Design service includes measurement and photography guidance that can help organize this information.
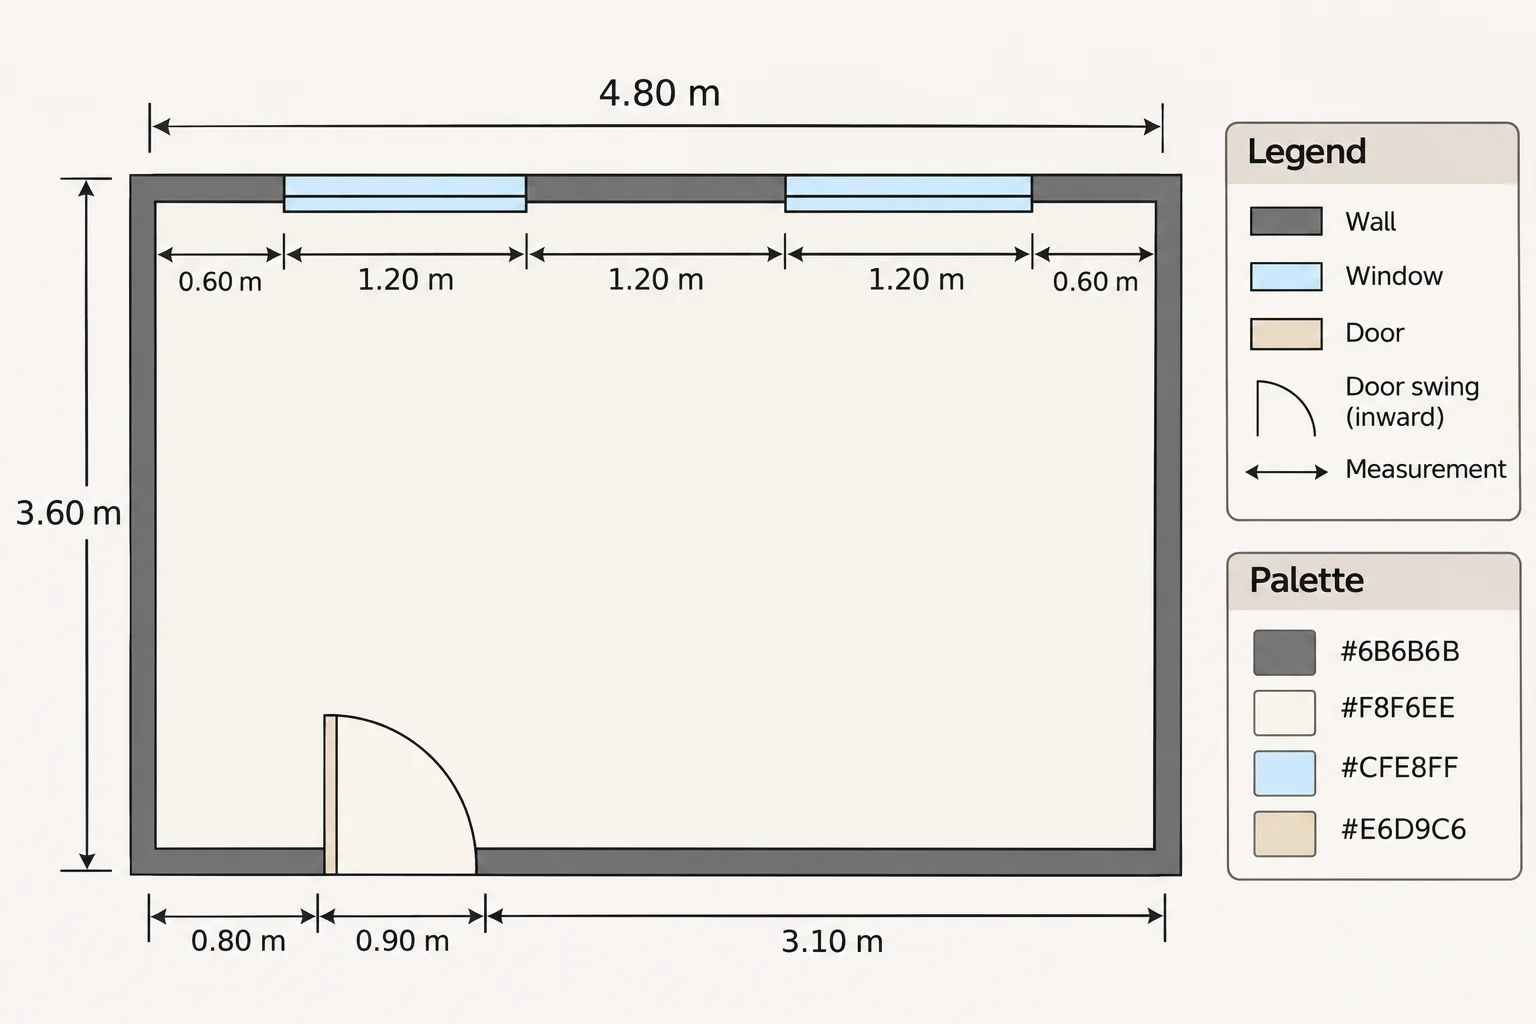
- Room shell: every wall length, ceiling height, and any change in wall depth.
- Openings: door and window widths, corner-to-jamb distances, sill heights, and swing direction.
- Fixed features: outlet and switch locations, radiators, vents, built-ins, and trim.
- Evidence: take a straight-on photo of each wall and label it to match the sketch.
Measurements are only useful if their reference points are clear. Note whether a dimension runs to the finished wall, the edge of a casing, or the face of a baseboard. For a large room, add a second check across the space. Keep the sketch and photos together; they make it easier to catch a misplaced window or a forgotten radiator when the digital model looks plausible but does not match the room.
Build the room shell and fixed features
Enter the wall dimensions before placing furniture. Use the planner’s units carefully, and confirm whether it asks for centimeters or millimeters. Add doors and windows at their measured positions, then include obstructions that affect use: a radiator may prevent a sofa from sitting flush to a wall, while a low sill can limit where a desk can go. Add outlets where they matter for lamps, televisions, or charging. A basic model that matches the room’s fixed conditions is more useful than a detailed one with incorrect openings.
Sweet Home 3D describes itself as interior design software for drawing a home plan, arranging furniture, and viewing the result in 3D. Whatever tool you choose, check that you can enter exact dimensions and move objects precisely. Save a clean version of the empty room before trying layouts. That gives you a dependable base if a later experiment distorts the plan or you want to compare two furniture arrangements.
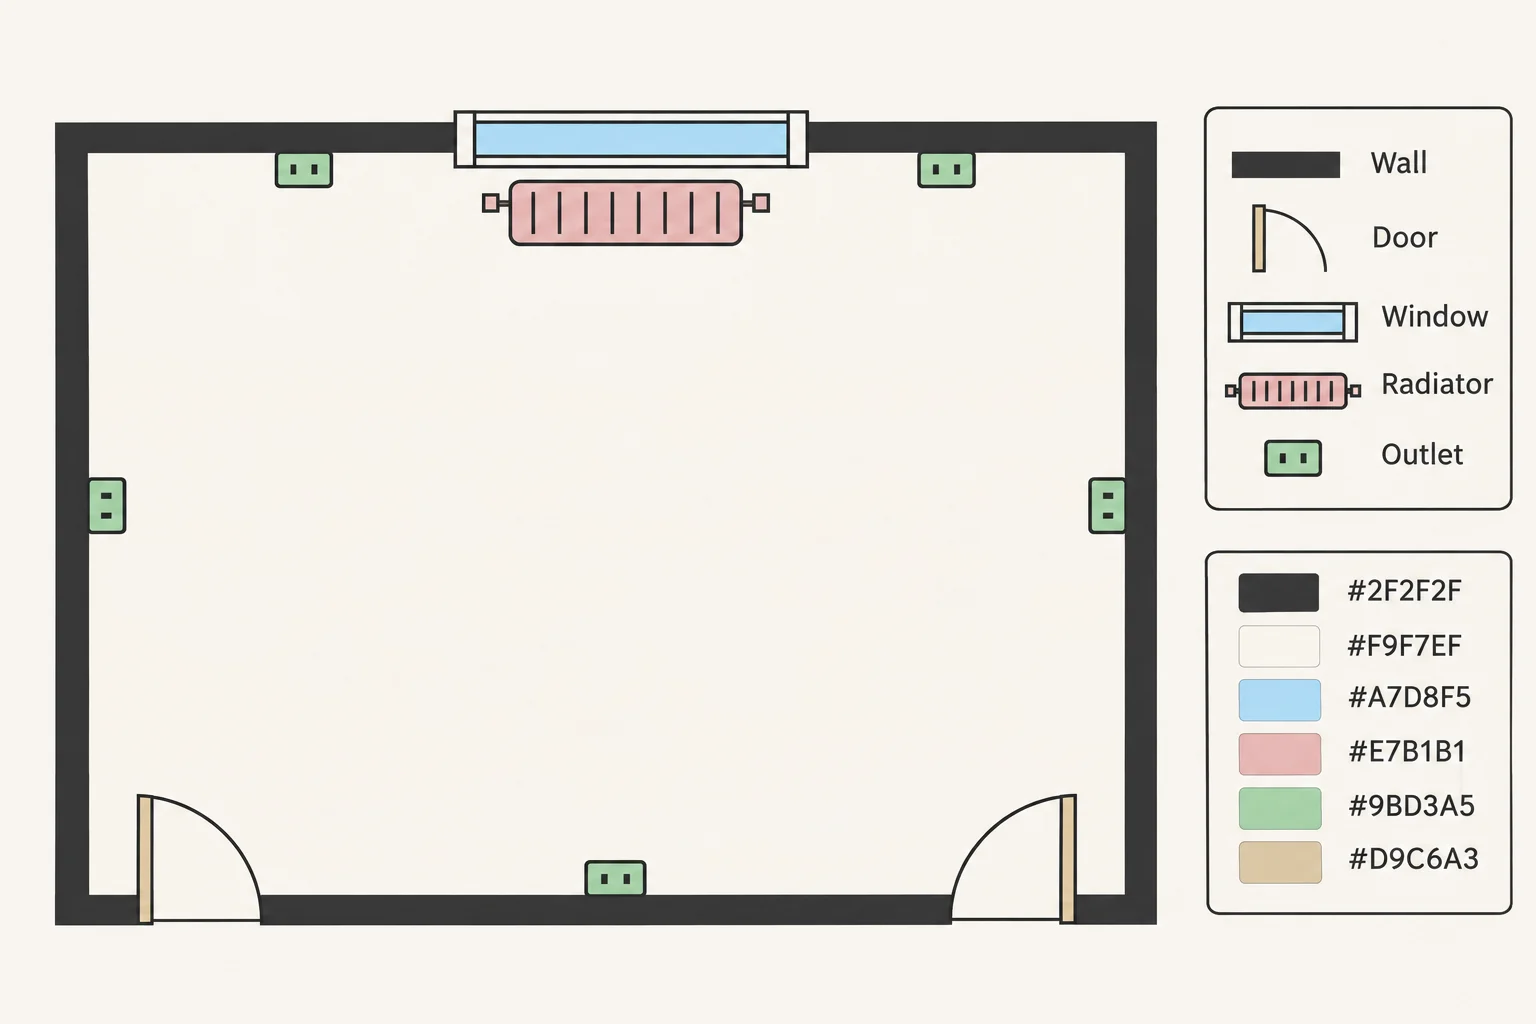
Treat the 3D view as a second way to inspect the plan, not as a measurement source. A perspective view can make a narrow gap appear wider, and a camera placed near a corner can exaggerate depth. Switch back to the overhead plan to verify positions and distances. If the software offers a scale or dimension display, use it; do not estimate a gap from how it looks on screen.
Model furniture at its full footprint
Use the manufacturer’s outside dimensions for each piece, including the widest points of arms, legs, and frames. A sofa listed as 210 × 90 cm (83 × 35 in) needs that entire footprint in the model, not the smaller area occupied by its seat cushions. For chairs, note whether they need room to pull back. For a table, include the chairs in their pulled-out positions; a tabletop that fits by itself may leave no space to sit down.
When a planner’s furniture library lacks the exact model, use a plain box or a custom object with the correct length, width, and height. Label it with the item name so you do not mistake a placeholder for a product. Check the product specification again before ordering: dimensions can refer to the frame, while removable cushions or reclining mechanisms need more space in use.
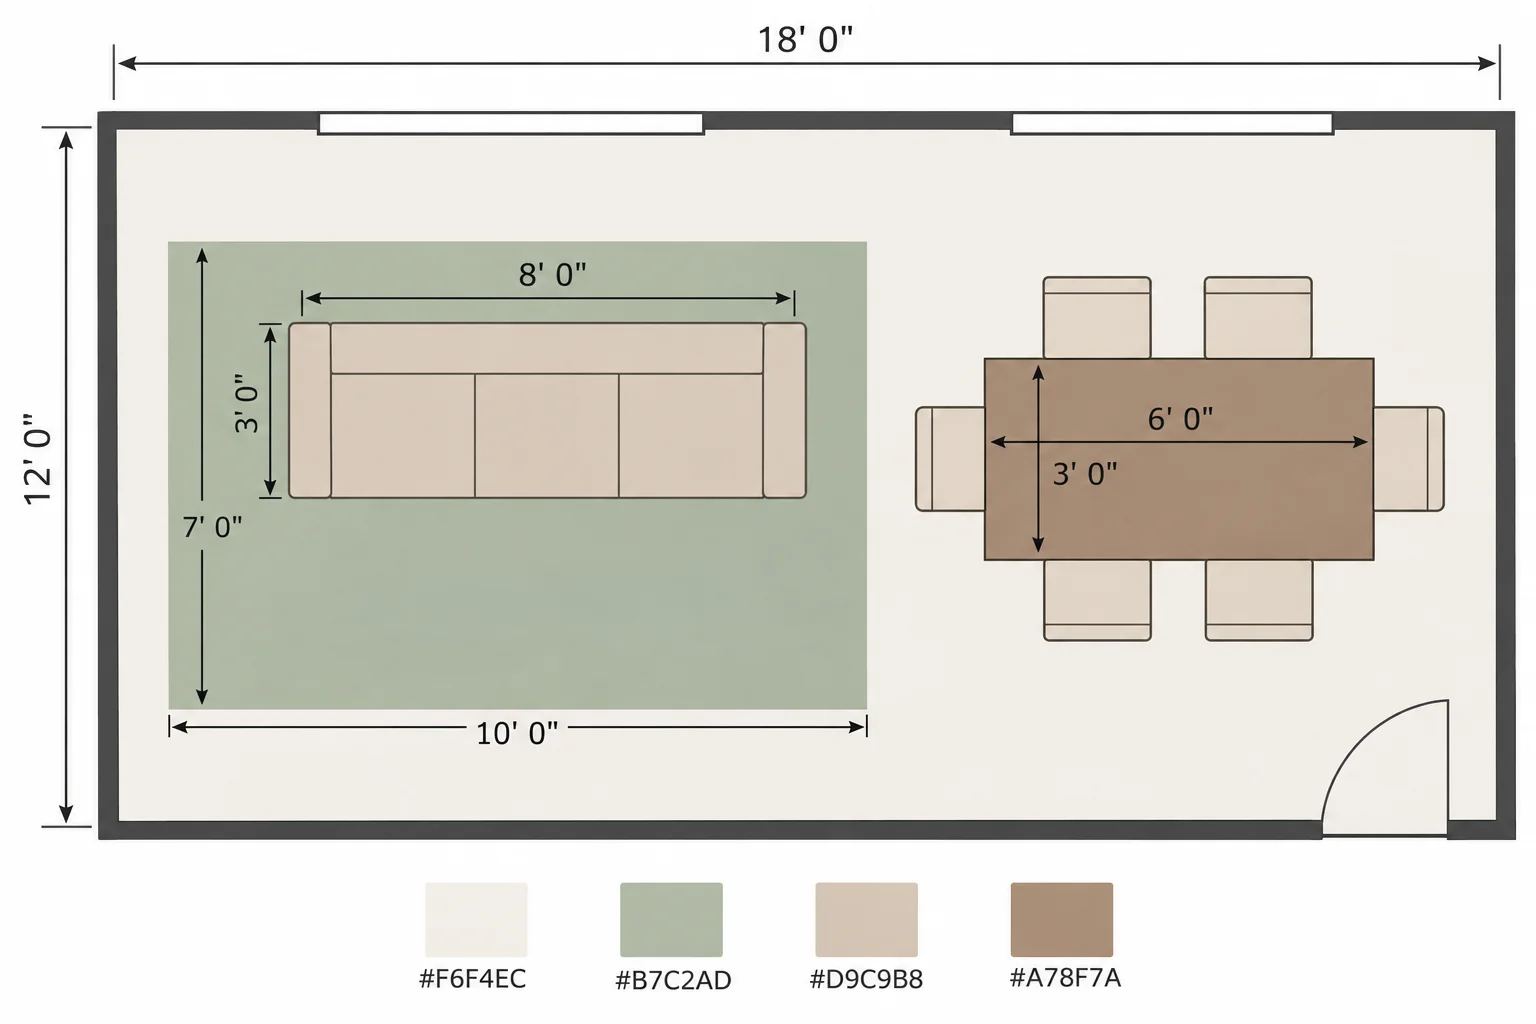
- Example sofa footprint: 210 × 90 cm (83 × 35 in), plus any extra space needed for reclining or access.
- Example dining table footprint: 120 × 75 cm (47 × 30 in); add chair footprints and pull-back space around the edges.
- Example occasional chair footprint: 60 × 60 cm (24 × 24 in); test its position with a person-sized route beside it.
- Add rugs as separate shapes, then check that their edges do not create awkward snags at doorways or in main paths.
These are sample footprints, not fixed furniture standards. Verify the actual item dimensions and test the arrangement with painter’s tape on the floor before ordering. Tape exposes practical problems that a screen can hide: a chair might block a drawer, a sofa arm might overlap a doorway, or the route to a window might be too tight. A paper outline or cardboard template can also help judge the scale of a bulky item.
Check circulation as well as fit
A piece can fit inside the room and still make the room difficult to use. Draw routes from the entrance to the seating, from seating to a window or balcony door, and between any dining and storage areas. As a general planning target, allow around 90 cm (36 in) for a main walkway where the layout permits. Treat that as a practical starting point, not an accessibility or building-code determination. The ADA Standards contain specific accessible-route provisions, so check the applicable requirements when accessibility is part of the project.
Model doors in their open positions and test drawers, cabinet doors, and reclining furniture at full extension. Keep the door swing clear, and do not count a narrow gap behind a chair as a usable walkway if the chair has to move first. A plan with several connected routes is often more workable than one that funnels every movement through a single pinch point.
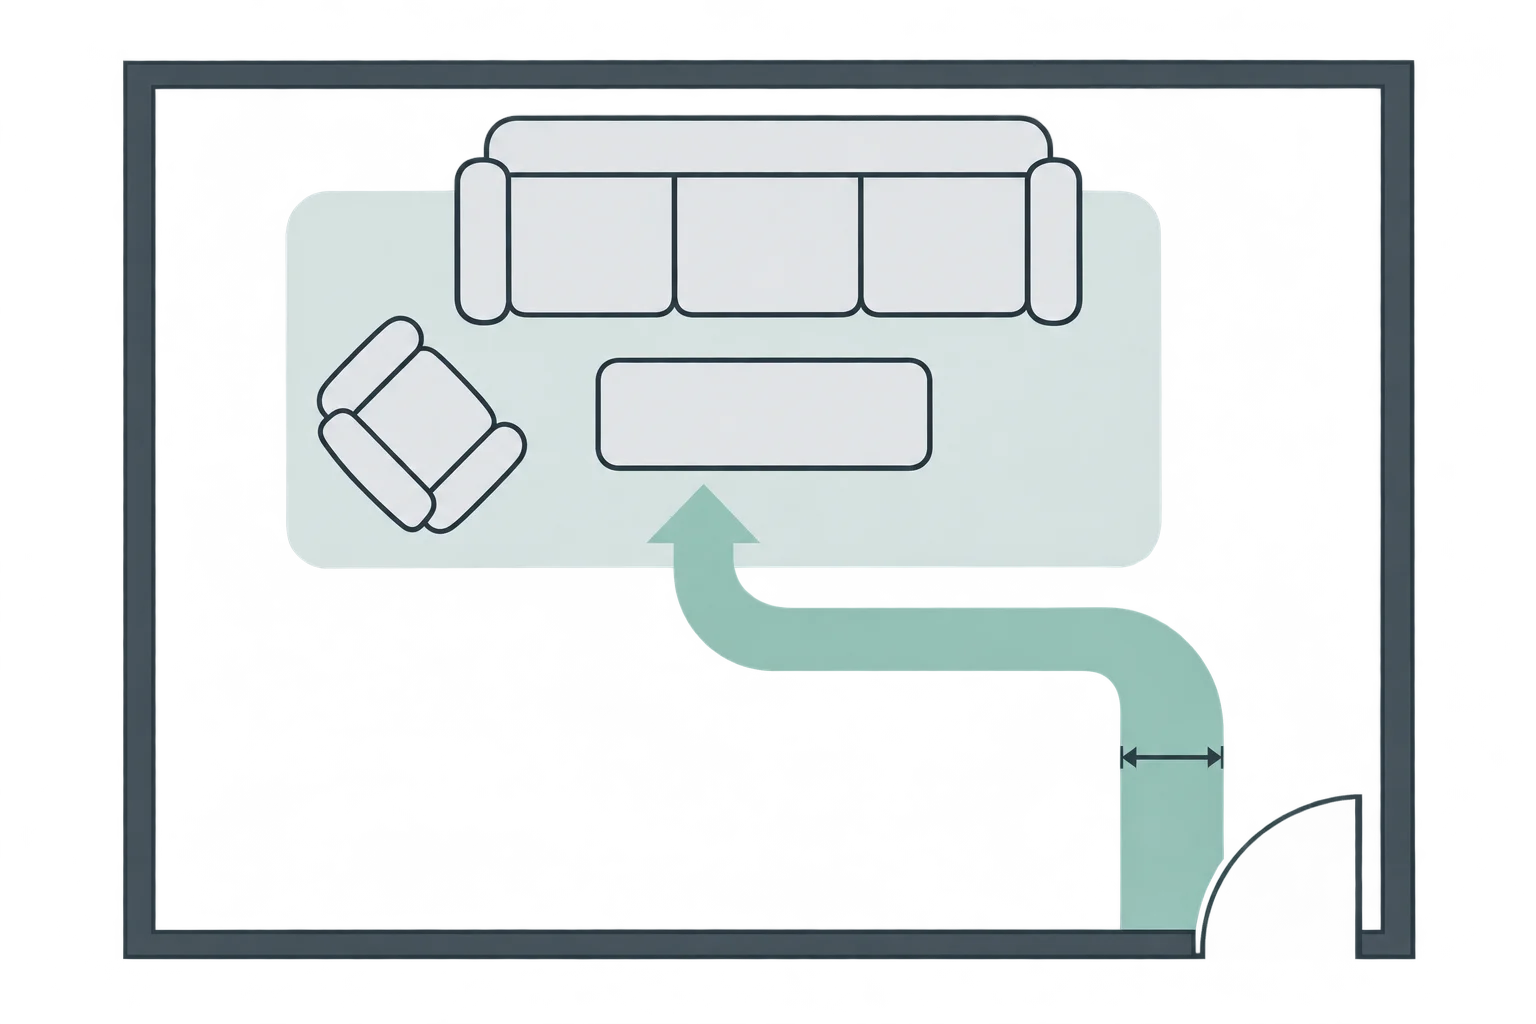
Run a few distinct tests rather than trusting one polished view: trace each route on the overhead plan, inspect the room from the doorway in 3D, and compare the largest furniture option with a smaller alternative. A rendered image can help reveal blocked sightlines or an awkward cluster, but it cannot reproduce the bodily sense of crowding, the softness of upholstery, or the changing quality of daylight. Use the model to screen out obvious problems, then use tape and samples to check decisions in the actual room.
Choose a free tool or hire a designer
A free planner is usually a sensible choice when the room is straightforward, the furniture list is short, and you are comfortable measuring and checking specifications. It lets you compare several footprints without moving heavy objects. Set aside time to learn the controls, verify the scale, and correct the room shell. The weak point is not the price of the software; it is the quality of the information entered. A precise-looking model built from guessed dimensions can be more misleading than a rough sketch.
A designer may be worth hiring when the room has multiple functions, unusual angles, built-in storage, or accessibility needs, or when you want help coordinating furniture and finishes as well as testing fit. Ask what the project includes before agreeing: a measured plan, furniture specifications, revisions, rendered views, and a purchasing list are distinct deliverables. IKEA’s page How does the remote interior design process work and what is included? is one example of a service description to review when comparing scope. Confirm whether measurements are supplied by you or independently checked, and who is responsible for correcting errors.
For another reference when comparing commissioned work, a Portuguese interior design studio’s Portuguese-language page about 3D room projects can show how a provider presents this kind of service: 3D room project examples. Treat it as a scope reference, then ask any designer what the drawings and views will let you verify before you buy.
Before committing to a paid project, send the room sketch, labeled wall photographs, and a list of existing furniture you intend to keep. Ask for a top-down plan with dimensions as well as any 3D views, and request that proposed furniture be modeled at its specified size. A useful deliverable should make it possible to check clearances and placements—not merely show a persuasive image. Keep the measured plan even if you later change the furniture; it remains the basis for checking each new option.
Questions
- Should I measure to the baseboard or the wall?
- Record the finished wall dimensions and note baseboard depth separately if it affects how furniture sits. For a tight fit, use the actual usable dimension at furniture height and check the trim in the room.
- Can a 3D planner tell me if a sofa will fit through the door?
- Not from the room layout alone. Check the sofa’s packaged or disassembled dimensions, door opening, hallway turns, and stair or elevator access separately.
- How accurate does a free room-planning tool need to be?
- It needs to accept the room and furniture dimensions accurately enough to compare footprints and clearances. Confirm key measurements on the plan and with floor tape before ordering.
- Does a 90 cm (36 in) walkway meet accessibility requirements?
- Not necessarily. It is a general layout target, not a compliance ruling. Accessibility requirements depend on the applicable standards and the specific route and conditions.
 Frame 1